How to Do the Splits for Beginners Without Forcing Flexibility
Learn how to work toward front and side splits with safe stretches, realistic progress markers, and practical advice for beginners.
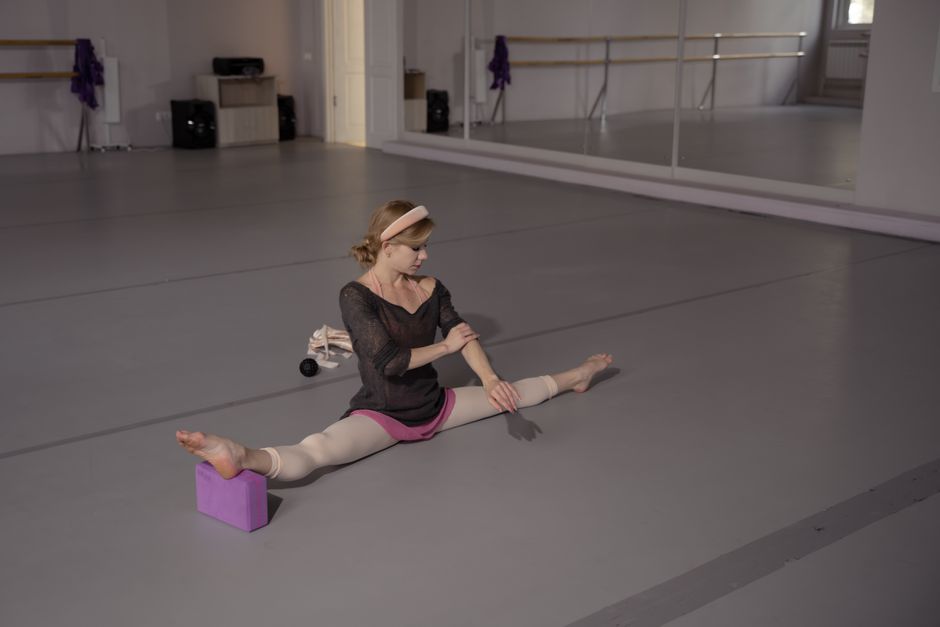
Learning how to do the splits takes consistent mobility work, patience, and good control. Most beginners will not reach the floor quickly, and forcing the position can strain the hamstrings, hip flexors, groin, or lower back. A safer approach is to warm up first, practise several times per week, and stop before sharp pain.
Which split should you learn first?
A front split places one leg forward and the other behind you. It mainly challenges the hamstrings, hip flexors, and quadriceps. A side split, sometimes called a middle split, moves both legs out to the sides and usually requires more groin and hip mobility.
Beginners often find the front split easier to measure because the position is more familiar from lunges. However, your anatomy, previous activity, and natural hip structure affect which version feels more accessible. Start with the variation that feels controlled rather than choosing one based on appearance.
How to prepare your body for split training
Do not begin deep split stretches with cold muscles. Spend five to ten minutes raising your body temperature with brisk walking, light jogging, cycling, or easy dancing. Then move through controlled exercises such as bodyweight lunges, leg swings, glute bridges, and slow squats.
A warm-up should make your muscles feel ready, not exhausted. Large, fast leg swings are not a substitute for control. Keep your torso steady and use a smaller range if your hips or hamstrings feel tight.
How to do a front split safely
- Start in a low lunge. Place one foot forward and lower the back knee onto a folded mat or cushion.
- Square your hips. Try to point both hip bones forward instead of allowing the pelvis to twist toward the front leg.
- Extend the front leg gradually. Straighten the front knee as far as you can while keeping your back long. Flexing the front foot can increase the hamstring stretch.
- Slide only to a manageable depth. Use yoga blocks, books, or firm cushions under your hands so you do not collapse into the position.
- Hold with relaxed breathing. Stay for about 20 to 30 seconds, then come out slowly. Repeat two or three times on each side.
For the rear leg, focus on gently lengthening the hip flexors and quadriceps. Do not turn the front leg outward just to appear closer to the floor. Poor alignment can shift stress into the knee or hip.
How to work toward a side split
For a side split, begin with wide-knee child’s pose, a supported frog stretch, adductor rock-backs, and gentle seated straddle stretches. Keep the movements slow and use your hands or blocks to support your weight.
From a standing position, you can also place your feet wide and bend slightly at the knees before shifting your hips back. Gradually straighten the legs only while maintaining control. In a deeper side-split position, keep the knees and toes facing upward or forward according to your comfortable alignment; never force the knees to rotate.
A beginner flexibility routine
Practise this routine three or four days per week, preferably after exercise or a warm-up:
- Five to ten minutes of light aerobic movement
- Ten controlled leg swings per direction on each leg
- Two sets of eight slow lunges per side
- Two 20-second half-split stretches per side
- Two 20-second low-lunge hip-flexor stretches per side
- Two 20- to 30-second supported straddle or frog stretches
- One or two gentle split attempts using blocks for support
Strength work matters as much as passive stretching. Add controlled leg lifts, split squats, glute bridges, and adductor exercises so your muscles can support the range of motion you are developing. Active flexibility is easier to use safely than a position you can reach only when relaxed and pushed down.
How long does it take to learn the splits?
There is no reliable deadline for learning the splits. Someone with a background in dance, gymnastics, martial arts, or yoga may progress in weeks or months, while another beginner may need much longer. Age, joint structure, training history, recovery, and consistency all influence the result.
Measure progress by small changes: a lower supported position, better hip alignment, less tension, or greater control when entering and leaving the stretch. Taking a photo or measuring the distance from your hips to the floor once every few weeks can show changes that are difficult to notice day to day.
Common mistakes that slow progress
- Stretching aggressively: A strong pulling sensation can be acceptable, but sharp, pinching, burning, or sudden pain is a reason to stop.
- Skipping the warm-up: Cold muscles usually tolerate deep stretching less comfortably.
- Training only once in a while: Short, regular sessions are generally more useful than an exhausting session every few weeks.
- Ignoring alignment: Twisted hips, collapsed knees, or a rounded lower back can move stress away from the intended muscles.
- Bouncing in a stretch: Use smooth movements and gradual holds instead.
- Comparing both sides: It is normal for one leg or hip to be more flexible than the other.
Safety questions beginners often ask
Should splits hurt?
You may feel mild to moderate tension in the target muscles, but splits should not cause sharp pain, numbness, tingling, joint pinching, or pain that lingers after the session. Reduce the range or stop if those symptoms appear.
Can I practise split stretches every day?
Gentle mobility can be done daily, but deep stretching is not automatically better every day. Give sore muscles time to recover and alternate demanding sessions with lighter movement if needed.
What if I cannot keep my hips square?
Use a higher position and place your hands on blocks. A shorter stretch with good control is more useful than a deeper position created by twisting the pelvis.
When should I seek professional advice?
Speak with a qualified physiotherapist or healthcare professional if you have a previous hip, knee, hamstring, groin, or back injury, or if stretching produces persistent pain. Stop training and seek prompt medical advice for significant swelling, weakness, numbness, or a sudden injury.
To learn how to do the splits safely, focus on regular warm-ups, supported positions, active strength, and gradual range. The floor is not the only measure of progress; stable alignment and pain-free control are better signs that your flexibility is improving.